Hair Tool Storage: Dryers, Irons and Brushes
Where to keep a hair dryer, styling irons, cords and brushes so nothing tangles: four storage options, a simple cord method and the unplug, cool, then store order every option depends on.
Hair tools are awkward to put away. A dryer is bulky, styling irons are long and thin, and every one of them trails a cord that knots itself around the others. Pushed into a drawer together, they come out as a single tangle.
Good hair tool storage solves two problems at once: each tool gets its own space, and the order in which you put things away becomes a habit. That order comes first, because it applies to every storage option that follows.
The order that never changes
Whatever storage you choose, the sequence at the end of each use is the same:
- Unplug. Switch the tool off and take the plug out of the outlet.
- Let it cool completely. Follow what the tool’s manual says about cooling down, including where to set it while it does.
- Then store it. Only a cool, unplugged tool goes into a drawer, bin or holder.
The cooling step is the one people rush. It helps to build it into your routine: unplug the tool, finish getting ready, and put it away as the last thing you do before leaving the room.
Where the tools can live
Once a tool is cool, there are four common homes for it. The right one depends on how much drawer and cabinet space you have.
| Option | Suits | Check first |
|---|---|---|
| Deep drawer with compartments | Two or three tools used most days | Inside depth and height of the drawer |
| Bin on a cabinet shelf | Tools used a few times a week | A bin with handles that slides out easily |
| Holder on a cabinet door or wall | Small bathrooms with no spare drawer | The holder’s instructions and the door clearance |
| Countertop stand or caddy | A long counter with a dry end | Distance from the sink |
A deep drawer
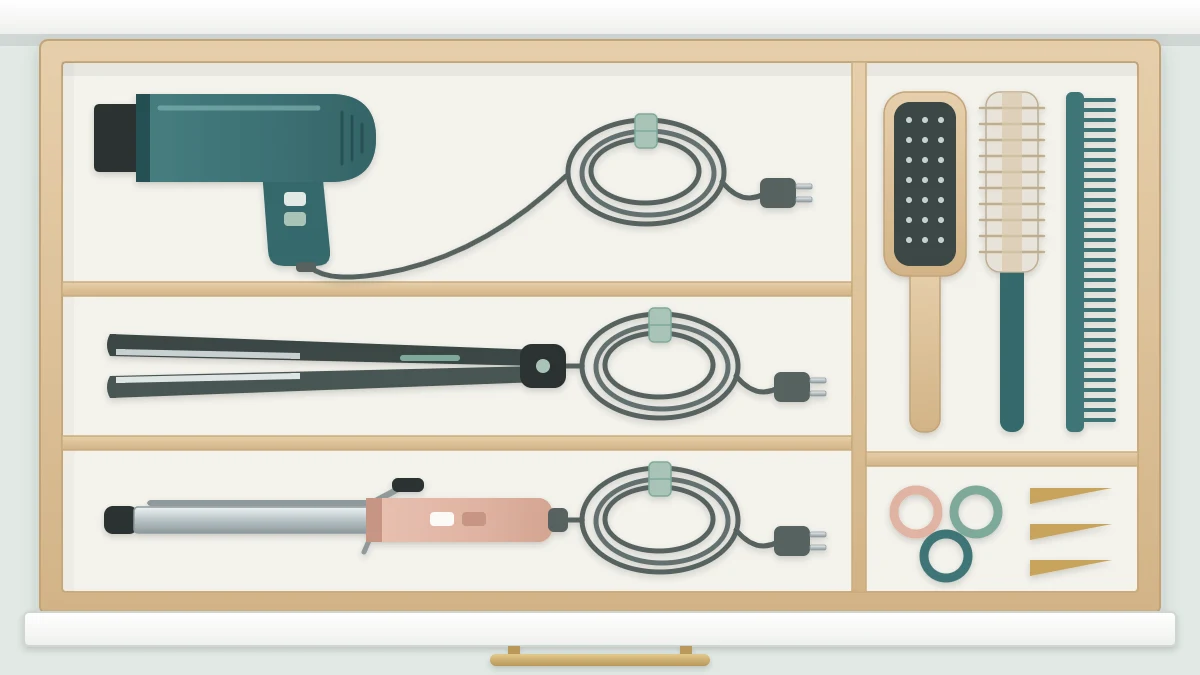
A deep drawer is the simplest home. Divide it into long compartments, one per tool, using expandable dividers or narrow bins laid front to back. Each tool lies flat with its cord beside it, so lifting one out does not drag the others along. The guide to organizing a deep bathroom drawer covers dividers and layering in more detail.
A bin on a cabinet shelf
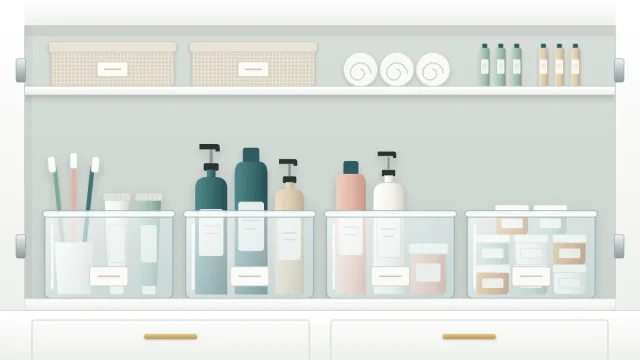
If you have no deep drawer, use one handled bin per tool, or one larger bin with the tools standing handle-up. Put it on a shelf inside the vanity where you can pull it out with one hand. For help deciding which shelf, see the guide to arranging a vanity cabinet.
A mounted holder
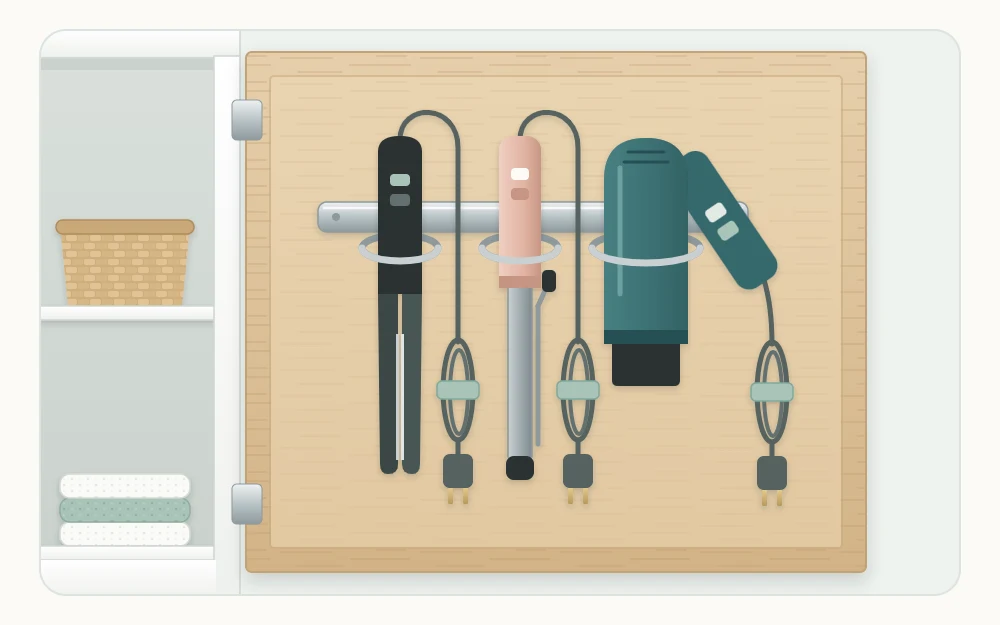
A holder with rings or cups, fixed to the inside of a cabinet door or to a wall, keeps tools off every shelf. Mount it as its own instructions direct, with fixings suited to the surface, and stay within its stated load rating. Before fitting, check that the door still closes with the tools in place and that nothing touches the plumbing inside the cabinet.
A countertop stand or caddy
A stand keeps daily tools within reach, at the cost of counter space. Place it at the end of the counter farthest from the faucet. If the counter is short and the sink takes up most of it, choose one of the closed options. The guide to organizing a bathroom countertop can help you decide what stays out.
Cords: loose coils and soft ties
Cords cause most of the tangling, and they are easy to tame.
- Gather the cord into a loose coil about the width of your hand.
- Secure the coil with a soft tie, such as a fabric strap or a reusable hook-and-loop tie.
- Lay the coil beside the tool in its compartment.
Do not wrap the cord tightly around the body or handle of the tool, and avoid sharp bends where the cord meets the handle. Each tool’s manual says how its cord should be handled, and the manufacturer’s instructions are the ones to follow.
Brushes, combs, clips and elastics
The small accessories need containing as much as the tools do, or they fill every gap in the drawer.
- Brushes and combs: a divided drawer section, or an upright cup if you keep them on a shelf.
- Clips and pins: a small lidded box, so they do not scatter.
- Elastics: looped onto a ring or a large clip, or kept in a small jar.
- Headbands: stacked in a shallow bin or slid over a narrow upright container.
Keep accessories in the same zone as the tools, so everything for doing your hair is in one place.
Keep attachments with their tool
Diffusers, concentrator nozzles and interchangeable barrels are easy to lose because they are stored wherever they fit. Give each tool’s attachments a spot in the same compartment or bin as the tool itself. A zip bag or a small fabric pouch keeps loose pieces together.
If an attachment has not been used since the tool came out of its box, it can move to a backup shelf, but keep it in a marked bag so you know which tool it belongs to.
Water, heat and outlets: the rules to organize around
Storage choices for electrical tools sit inside a few fixed rules. They are short, and each tool’s manual is the authority on the detail.
- Use and store electrical tools away from the sink, tub and shower, and never in a place where they could fall into water.
- Do not leave tools plugged in when they are stored. Unplug after every use.
- Do not rest a hot tool on a surface, or put it in a drawer, pouch or holder, until it has cooled. The only exception is a holder whose maker states it is designed for a warm tool; follow that maker’s instructions exactly.
- Do not add power strips, extension cords or in-drawer outlets to a bathroom yourself. Outlets and wiring are a job for a qualified electrician.
Good to know
In homes with children, store hair tools unplugged, out of sight and beyond their reach. For wider reading, see the American Academy of Pediatrics’ HealthyChildren.org page on bathroom safety.
A two-minute weekly reset
Hair tool storage drifts when a tool goes back in a hurry. Once a week, take two minutes to put it right:
- Return each tool to its own compartment.
- Re-coil any cord that has come loose and fasten its tie.
- Gather stray clips and elastics back into their containers.
- Pull loose hair from brushes and drop it in the trash.
Frequently asked questions
Where should I store a hair dryer in a small bathroom?
Once it is unplugged and has cooled completely as its manual describes, a handled bin on a vanity shelf or a holder mounted inside a cabinet door per its instructions both work well. Choose a spot away from the sink, tub and shower, and keep the cord loosely coiled beside it.
Can I put a curling iron away right after using it?
No. Unplug it and let it cool completely first, following what the manual says about cooling down. Do not put it in a drawer, pouch or holder before then, unless the holder's maker states it is designed for a warm tool. Putting tools away last, after you finish getting ready, makes this easy.
How do I keep hair tool cords from tangling?
Gather each cord into a loose coil about the width of your hand, secure it with a soft tie and lay it beside the tool in its own compartment. Avoid wrapping the cord tightly around the tool, and follow the manufacturer's instructions for how the cord should be handled.