How to Measure Bathroom Drawers for Organizers
A step-by-step way to measure the inside of a bathroom drawer, allow for obstructions and clearance, and test an organizer layout with paper templates before buying.
At a glance
What you need
- Tape measure
- Paper and pencil
- Scissors
- Scrap paper for templates
Most drawer organizers that end up unused failed for one reason: they were bought from a guess. A tray that is a fraction too wide will not go in at all, and one that is too small slides around and leaves gaps where loose items collect. When you measure drawers for organizers before shopping, the fit is decided on paper, where mistakes are free.
The method takes one drawer, a tape measure and a few minutes. The steps are below, followed by a paper-template trick for checking a layout and a note on using the same approach for shelves and the space under the sink.
Why a tight fit matters
An organizer works by holding compartments still. If trays cover the drawer floor edge to edge, each one is locked in place by its neighbors and the walls, and items stay where you put them. If there is spare room, the trays drift every time the drawer closes, and the gaps fill with whatever falls out of them.
The margin for error is small in both directions. That is why you need the inside dimensions, measured carefully, and not the size of the drawer front or a rough estimate.
What you need
- A tape measure, ideally a rigid retractable one, or a ruler for small drawers.
- Paper and a pencil.
- Scissors and a few sheets of scrap paper for templates.
Measure step by step
- Empty the drawer. Take everything out and wipe the inside. You cannot measure accurately around contents.
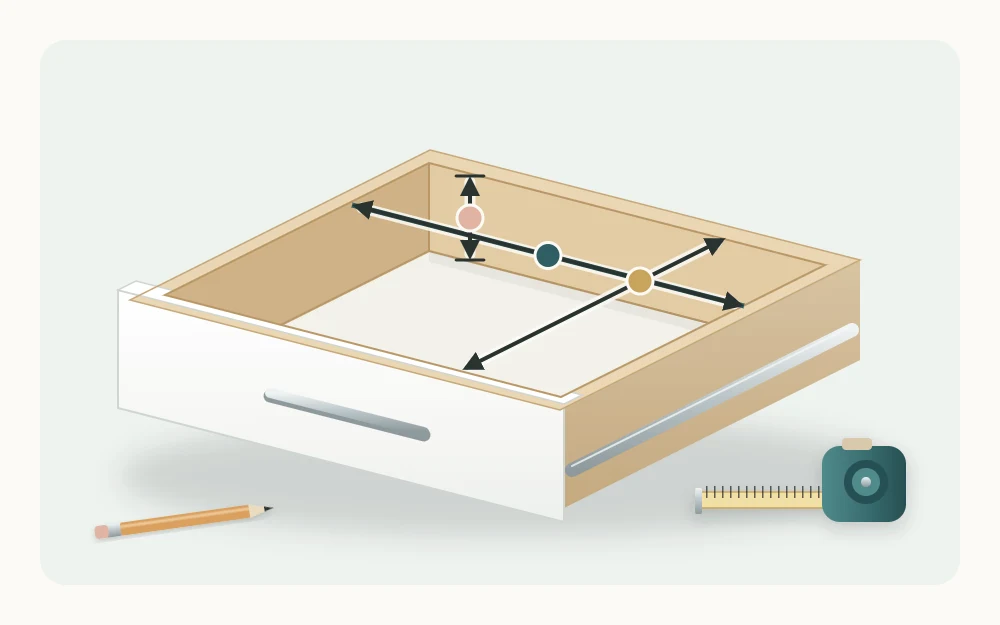
- Measure the inside width. Go from inner wall to inner wall, left to right. Take it twice, once near the front and once near the back, because drawers are not always square.
- Measure the inside depth. This is front to back, from the inner face of the drawer front to the inner face of the back panel. Again take it in two places, along the left side and along the right.
- Measure the usable height. Close the drawer until only a hand’s width is open and look at what passes over it: the cabinet frame or the bottom of the drawer above. Measure from the drawer floor up to the lowest of those, not just to the top of the drawer side. In some drawers the side is the limit; in others the frame sits lower.
- Write down the smallest number for each. If the width is slightly less at the back than at the front, the smaller figure is the one that counts. An organizer has to pass the narrowest point.
- Subtract a small clearance. As a starting point, take off about 1/8 in (3 mm) from the width and the depth so pieces drop in without forcing, and a little more from the height so nothing catches as the drawer closes.
Tip
Record the numbers in one consistent order, such as width, then depth, then height, and note which drawer they belong to. Product dimensions are often listed in a different order, and mixed-up figures are an easy mistake.
Note the obstructions
The three numbers describe a perfect box, and real drawers are not always one. Look inside for anything that takes space away, and mark it on your notes:
- Rounded corners. Molded drawers often curve where the floor meets the walls, so a square-cornered tray sits slightly away from the edge.
- Slide hardware. Some slides or brackets project into the drawer along the sides or at the back.
- A plumbing notch. A drawer in a sink base is often U-shaped, with an opening at the back that makes room for the pipes. Treat it as two side sections and a shallow front section, and measure each one.
- Sloped or stepped sides. If a wall leans, measure the width at floor level, where the organizer will sit.
Sketch the drawer and plan compartments
Draw the drawer floor as a simple rectangle and write the final width and depth on it. Add any obstructions. Then look at the sorted contents and list the categories that will live in this drawer, with a rough idea of how much space each one needs.
Divide the rectangle into compartments, one per category. Put the longest item first, since it fixes the length of one lane, and fit the smaller compartments around it. How to decide what goes where, and which divider type suits which job, is covered in the guide to bathroom drawer layout, dividers and trays.
Test the layout with paper templates
Before buying anything, cut pieces of paper to the footprint of each organizer you are considering and lay them in the empty drawer. The result shows at once whether the combination covers the floor, where the gaps fall, and whether a piece collides with a rounded corner or a bracket.
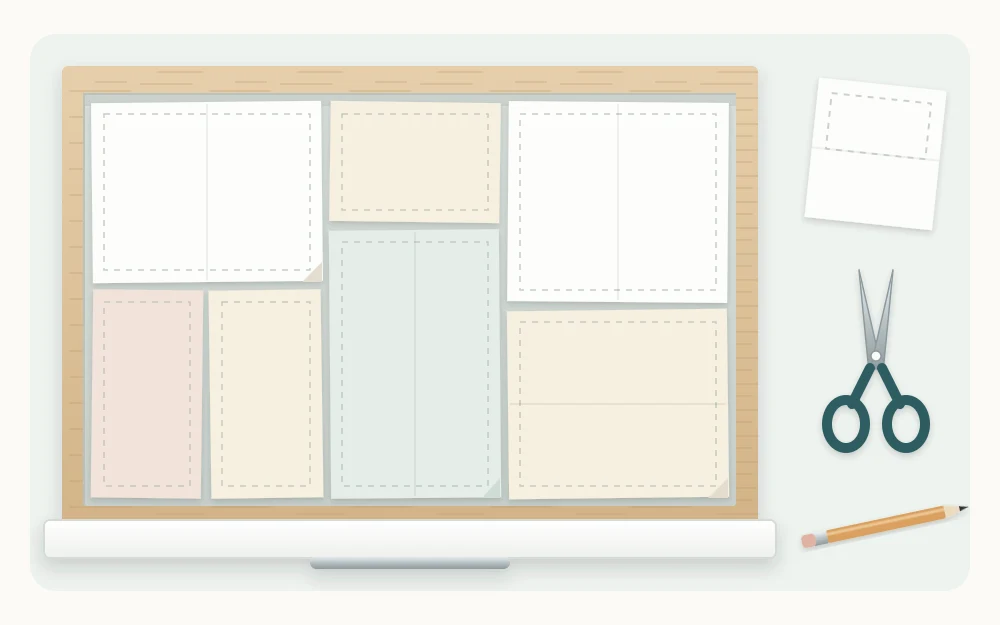
Set the actual items on their templates as well. A compartment that looks generous on a sketch can turn out too short for the comb or tube it was meant for. Rearrange the papers until the floor is covered, then note the sizes.
Compare with organizer dimensions
With a plan in hand, compare it with the sizes given for each product. Three checks prevent most disappointments:
- Outside or inside size. A listing may give the outer dimensions, the inner ones, or both. The outside size has to fit your drawer; the inside size has to fit your items.
- Top or base. Many trays taper, so the rim is wider than the base. The widest point is the one that matters for fit.
- Height. Check it against your usable height, including any lid or handle.
For expandable dividers, check that your drawer’s width or depth falls inside the stated range, not at its very end. For a tall drawer, height becomes the main question, and the guide to organizing deep bathroom drawers explains how to use it.
The same method for shelves and under the sink
A cabinet shelf is measured the same way: inside width, depth and clear height in two places each, smallest numbers kept. Add the width of the door opening, since a bin has to pass through it, and note hinges that project inward.
Under the sink, sketch the floor of the cabinet and mark where the pipes come down and where the shut-off valves are. Plan containers around those positions without touching the plumbing, and keep the valves reachable. The guide to under-sink organization takes it from there.
Frequently asked questions
Do I measure the inside or the outside of the drawer?
The inside. Measure from inner wall to inner wall for width, from the inner face of the front to the inner face of the back for depth, and from the floor up for height. The drawer front is larger than the usable space behind it.
How much clearance should I leave for a drawer organizer?
As a starting point, about 1/8 in (3 mm) less than the smallest inside width and depth lets pieces drop in without forcing while still fitting snugly. Leave a little more above the organizer so nothing catches on the frame or the drawer above when it closes.
Why do my measurements differ from front to back?
Drawers are often slightly out of square, and some taper or have rounded corners at the floor. That is why each dimension is taken in two places. Use the smaller number, because an organizer has to fit through the narrowest point of the drawer.